Saturday, January 26, 2008

Design Class With Brian #3

Today's lesson is all about this site. I've been meaning to get around to redesigning the site for probably a year now... that's when I had the inspiration for what I wanted to do. Things come up, projects supercede other projects and time goes by without the original project even started. In this months grand scheme of 'cleaning up' I decided it was time to finally try and change the blog.

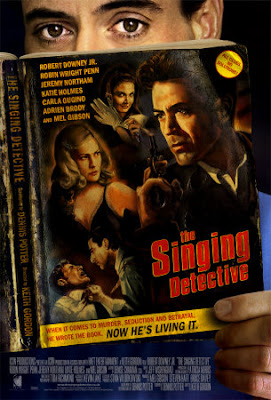
My original thought was to design something really tabloid-ey and/or pulpy. I was thinking National Enquirer or the Weekly World News. I had been thinking about L.A. Confidential, the Curtis Hanson movie from 1997. In the movie, Danny Devito plays the editor of a tabloid called 'Hush Hush'. Sid's line was always "Off the record, on the QT, and very hush-hush." From there, I started to think about the new design in very film noir terms. Something similar to, maybe, the Singing Detective poster...


Anyway, that was a year ago. Things change, I forget what I was even thinking about at the time (truth be told, that happens for me within about five minutes of any one original thought). Today, when I started, I headed over to Google Images and searched for Tabloid. There were some thoughts that seemed interesting, but nothing that really wowed me. I played around with the Weekly World News logo a little bit but I really wasn't feeling it. Then, I started to think about pudgy superheroes, put on Michael Giachinno's score to The Incredibles and started to think about pulp again.

One of the first images I saw was this
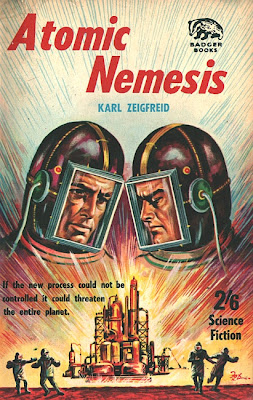

I knew this wasn't the right image, but I really felt like it was starting to head towards the vibe I was feeling. I dug through some more images and came upon this


I felt like the "All Night Stand" could be a logo so I grabbed a chunk of the lettering, went to What The Font (I love What The Font. I can't imagine living without having it as a resource. Maybe someday I'll have a mind for fonts, being able to pick out a font by just glancing at it, but for now I just have to settle on a piece of software that can do a pretty good job of guessing for me)
I'd post the results of the first round but I think I sabotaged myself. I really meant to save the logo and, for whatever reason, didn't. I did get two things out of the first design though, the colors and the idea to put some weathered texture on top of my logo text.
Not feeling the design, I went back to google and wandered to another pulp covers site.
There, still thinking about the red and yellow colors, I stumbled on this..
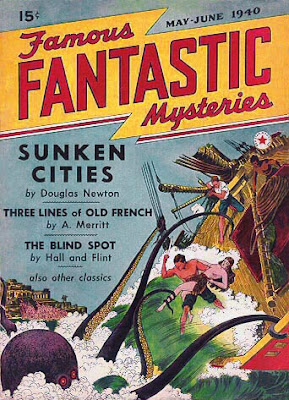

I really liked the lightning bolt headline. I wasn't as excited about the fonts, but that wasn't as much of an issue. I wandered over to my favorite comic book fonts site, and came across a couple fonts I really dug; Detectives Inc. and Feast of Flesh!
I pulled the image into Illustrator and started to sketch out the lightning bolt header.

Now, when you're sketching something in Illustrator (or any other design program), break down what you need to do into simpler items. I could use the pen tool to trace along the edges of the lightning bolt, but it's much easier to rotate the image and draw primitives. By straightening the lightning bolt I can draw a rectangle and then select just one of the points of the rectangle to create my angle. Then, I copied the first rectangle and used the reflect tool to create an object that matched up with right part of the lightning bolt. I copied the second triangle and pasted it again. I matched up the bottom part of that object to the bottom of the first rectangle and then adjusted the third object to make the middle part that connects the two objects. Then, to combine everything you just use the Merge tool inside the Pathfinder palette. The other reason for designing the object straight is so that you can lay out your text straight. Then when you rotate it, the text is all rotated to the same angle as your lightning bolt. Are there other ways to do it? Sure there are and, in some cases, I imagine they might work even better, but this is the way I work.

Here's version one of the logo layed into the background I had grabbed for the original logo I mentioned above.


I like it, but I really felt that the header was way too big. I went back to the drawing board and elongated the header and set it up so that it didn't need to be rotated as much.


After slimming down the header I added a little bit of texture and added the blue (I thought it kind of reminded me of the original cover)

I felt the black wasn't working and I thought about what might more appropriately replace it. There was a tutorial over at psdtuts a couple of weeks ago all about creating a 'desktop' from scratch in Photoshop. That article made me think that maybe the warmth of the header would go with the warmth of a desktop. I tried searching shutterstock for 'desktopy' wood and ended up going back to the photoshop tutorial and grabbing the wood texture they linked to there. The image they linked to was much too big to integrate into a weblog background so I chopped a chunk of it off and massaged it into a repeatable background.

I have a quick and dirty trick for creating repeatable background patterns: mirroring. Grab a piece from the top of the design you want to repeat and paste it into a new layer. Flip it vertically so that the top is now the bottom and bring it down to the bottom of your new repeating texture. Create a new mask for that layer and draw out a gradient. With some massaging you should have a texture that's fairly seamless. You might need to massage it some more to make it look less repetitive. To make the left and right side repeat, use the same steps but in the other dimensions.

Here's where we were with the new backdrop
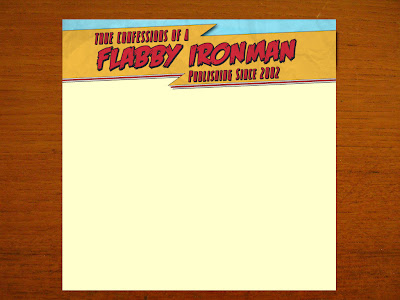


It felt really good, but it also felt like it needed something to anchor the design... enter, the footer


you can also see my first attempt at sidebar headers. I decided that the text needed to be straight to look normal with what would be straight links. I went into Illustrator, copied the text I had created for the header and proceeded to use the find and replace command to change the text on each of the three instances that combine each of the phrases. "Flabby Ironman" had three layers to it. The first layer consisted of the red. A second layer behind it added the stroke. I could have added a stroke to the red but (and this may have changed) in previous versions, when you add a stroke it starts to constrict the inner fill color. By putting the stroke on another layer that's behind the red, the red can stay the same as the stroke grows from behind it. A third copy of the text goes behind that layer of black and down and over a few pixels, creating the pseudo 3d look. By using find and replace I could change all three layers of text in one shot. Pretty slick.

Here's what my sidebar headers looked like when I was done.
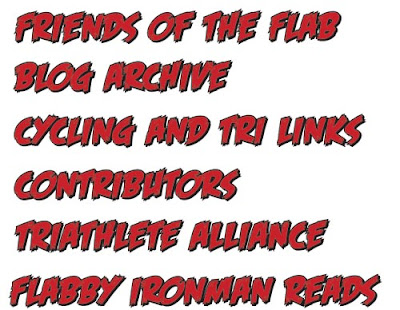

bringing that text into photoshop I chopped each of the lines of text up into transparent gifs. A bunch of time later after dealing with messy code, I ended up with all of the elements positioned. I was surprised that it was easy as it was to get everything into place. Things didn't work QUITE like I thought they would, but, aside from the border around everything it looks pretty much like I thought it would.

Off to bed. Tomorrow's another 'fake Monday' morning.

More tomorrow.

Ah, that feels good...

I've been meaning to update my blog template for what seems like months, or maybe even the last year. Today, with Ang out running errands, I decided it was time. I'll write up a design class with Brian tomorrow, but I wanted to post a celebratory post tonight. Now, the next step will be to update my design blog. That can wait a little while though.

Let me know what you think.

Hello, Hello... We're Going To Induce Vertigo...

Ang and i hit the theater Thursday night to see U23D on the Imax. I've ben curiously watching the newest generation of 3D movies to come out in recent years... the advances of polarized 3D versus the traditional red/blue separation method and I've really been enthralled by people using 3D as more of a story telling method than a showy special effect.

When I heard that U2 planned to release a 3D concert film I was more than a little bit excited. When the band appeared at Cannes last year with the first footage, I waited more than a little impatiently. Last week I found out it was opening this past Wednesday on Imax screens across the country and I knew that even though I couldn't be there opening day, I'd be there as quickly as I could.

Now that I've seen it, i have to say that I think I really have seen the future. There have been a lot of people talking about how 3D was going to change things. I saw Beowulf in 3D Imax a couple of months ago, but while it was cool, it wasn't anything that completely wowed me. It was also, I think one of the first modern films to be shot in 3D versus 'dimensionalized'. The dimensionalized movies I've seen (and I think Beowulf was also one these) work by moving pieces of the picture back and forth in the z plane. There's depth, but it's not true 3D... it's pieces of the plane pushed backwards. You see the depth but the pieces themselves are still flat. I'm probably all wrong about the technical specifics, but I never really got that feeling while watching U23D. There was still some of it that felt a LITTLE 'viewmaster', but these subtle shots the director picked up that showed a good deal of the stage and the thousands of people in the audience created a visceral reaction that I just really haven't experienced in a 3D film.

There's one shot in particular that wowed me. Towards the end of the show, U2 broke into a number and the crowd started jumping. The director cut away to a shot that was almost looking straight down on the audience. The crowd appeared as this undulating wave lake mass. Not jumping out at you, but definitely causing displacement on the screen. It was a little awe inspiring.

I have several U2 shows on DVD. I really like most of them in different ways. There's a moment in Rattle and Hum where the film transitions from black and white to color as the band breaks into Where the Streets Have No Name that's a really wonderful moment. There are moments during the elevation tour that are really spiritual... that translates to the DVD... but in the new film there's an emotional component that rose up in me that I think is only attributable to the 3D process. Watching from the crowd as the camera stands next to a guy with his girlfriend on his shoulder. Looking past the guy taking a picture with his cellphone camera, just sitting and watching the 3D of the stage behind the band, it was visceral in a way that I haven't experienced in a concert film before.

I guess the biggest praise I can give it was that it was an experience unique enough to make me want to experience it again. I normally don't see things in the theater more than once, but I know that I'll be back to see U23D again before it leaves the theater. If you get the chance, go. It probably helps if you're at least moderately interested in U2, but it's a really cool experience either way. I'm looking forward to seeing more 3D concerts this way. It's not quite like being at the concert in person, but at $10 a shot, it's a lot cheaper than attending in person.

Wednesday, January 23, 2008

Wednesday Morning

I was actually able to get up this morning and go do some lifting and jogging. I forget how wonderful it feels to get a workout in first thing. It wasn't the best jog I've had recently, but some of that had to do with time constraints. I think I'll need to start working on being asleep by ten so that I can get up at 6 to get my workout in.

Reading an old issue of Mens Health while laying on my office futon yesterday night, I read something that I'm going to try applying here at work. They recommended that you guard your first 90 minutes of the office day with your life because they're your most productive. I'm experimenting with that today. When I got in, I BRIEFLY skimmed my e-mail and dove into an editing project I needed to finish. Now that it's rendering, I figured I'd take a moment to blog.

Nate started to write about his goals the other day and I figured that since he's started to do it, I should probably quantify my goals as well.

I want to lose 20 more pounds of fat before the Red Canyon century in June. I don't care if that translates to 20 pounds off the 230 I'm at now or if it just means that I've added 20 pounds of muscle. In fact, I'd almost prefer to add 20 pounds of muscle. That's going to involve a pretty arduous lifting routine. I'll need to figure out if I have adequate equipment at our workout room (free) or if I need to get a membership somewhere.

I want to finish paying off our debt by the end of the year. If I can bring enough freelance in, I'd like to pay it off by July at the latest. We currently have somewhere around 11,600 left and we're paying around $1000/month. If I can get an extra $1200-$1500/month in freelance, I can bump that up to around $2000. I don't think that's completely unachievable.

Those are the two main goals. Any other races go underneath that because that's where our primary money allocation is going and races tend to be expensive.

Because of the price of entry fees I want to concentrate on just two centuries this year. Buena Vista Bike Fest on May 17 and the Red Canyon Century in Canon City on June 14. Both of those registration together should only be around $100. By budgeting some birthday money next month and buying fewer DVDs, I should be able to achieve that.

If I have another $100 to spend, I'd like to tackle some running races.

There's a series of running events in Colorado Springs called the Grand Prix of Running. Their first event is the St Patricks Day 5k in March. Running their three official events (St Patricks 5k, Take 5 (5k and 5mile) in the Garden (at Garden of the Gods), and the Classic 10k) should only run $60.

If I could find the money, I'd think about doing the Boulder 5430 in August (assuming that is that we don't end up moving this summer which is a distinct possibility)

I'm sure there are some other goals, but those are at least a few of them. If you want to toss some freelance my way in order to help eliminate some of this debt, I'd be more than honored to give you a quality product.

More later.

Monday, January 21, 2008

Time for more 'Design Class With Brian'

Thanks to Mr Martin Luther King I had the day off today. It's weird working for an organization that follows the schedule of a school district. I never used to get Marty Day off. 
Anyway, with the day off, my friend and coworker Hartley mentioned that she was working on this redesign of a Colorado Springs baby and maternity clothier. The site the store owner has now was designed for free and they were having issues getting content added to it. 
Before we look at where we went with it, let's look at some of the issues existing on the current site.
 
Here is the original front page. The designer distorted the aspect ratio of the logo and didn't resize the logo for a dial-up connection. It's not a horrible design but it's definitely very web 1.0.
 
There are several issues with the product subsection of the original store. To begin with, there's no great delineation between product lines. If they'd been able to add the rest of the product that they wanted to add, their wouldn't be a really great way to easily sort through products. Additionally, the original images have been distorted to the square size instead of being resized and cropped. This warps the look of the clothing and makes them to appear wider than they should be, (not an especially great thing for a website aiming at selling high-end maternity clothing to expecting mothers). On top of that, the images being loaded on the page are the high resolution images and not thumb nails... all in all, a real bandwidth hog of a page. 
When you click the images they're set to load the larger image in a new window. Here's what happens when you click a picture of one of the pairs of jeans...
I'm not sure if you can see the resolution of the photo (it's 1280x1920), but that's much larger of a picture than it probably needs to be. In addition to the photos largeness, the page doesn't tell me anything else about the pants... how to order them, sizes they're available in, colors they're available in, PRICE... There's a lot of information that would be really useful. 
So there's our starting point. Hartley was still quite happy with the logo she designed (as is the client, which is the most important part) so we started thinking about what kind of a skeleton we wanted to build the body of the site on. Doing some research at Design Float, a design writing aggregator site I read fairly often, I stumbled on a site  that has free CSS layouts available to design on top of. Looking through the templates, I stumbled on this layout and showed it to Hartley.
With the design chosen, we took a screen capture of the layout and brought it into Photoshop to start to put a skin on it. Before we did any work, we started to talk about what Hartley hoped to convey with the new look. I asked about the motto of the store and she mentioned "Fine Childrens and Maternity" and "European" (you can see the words I wrote down on my little notepad, below)
We started by grabbing the logo and dropping it on top of a newly created white background in the header section. When we dragged the EPS into our photoshop composition the image was much too large but instead of scaling it down, we converted it into a smart object and THEN scaled it down. The benefit of this is that it's almost like nesting the object inside of another composition. When you scale it down, you're scaling it down non-destructively, if you need to go and scale it up later (a no no if you're working destructively) you can scale it up and have it grab additional information from the composition it's nested in. It's a really great way to work and it's really starting to change the way I use Photoshop CS3. 
We tried adding some textures behind the logo to make it stand out, looking at various paisley patterns from shutterstock, and really didn't feel like it was gelling. 
Hartley had also mentioned in our initial discussions that she really liked the tone on tone look. 


Wanting to try it, we tried creating a gradient from brown to white and laying it in the background, then changing the background header color to the dark chocolate brown in the text of the logo. 
We really liked the way that the brown looked but it wasn't popping enough. There's kind of a trend in web design right now to do the 'web 2.0' thing. Glossy buttons, lots of polish. Another one of the sites I read, PSDTuts, posted a link to an article that gave us some inspiration. On my little notepad I drew Hartley some herringbone lines and we decided to try to layer some of those in along with highlites and lowlites on the brown. 


When drawing little herringbone lines, I'd suggest always doing it in a vector program like Illustrator. The biggest benefit is that since it's a vector program, you can select your items, copy them and rapidly paste them until you have enough to grab a couple of them, pull them out to where you want them to end, then select the whole batch and do an 'align and distribute' that creates your herringbone pattern. It's a really great, quick solution. 
The other nice thing about doing the lines in Illustrator was that, inevitably, when I screwed up, I could go back, delete a few lines from the middle, select the whole batch and distribute them again, making the space between the lines a little bigger. I also deleted all but one of my lines at one point, shrank the rotation on it to 20 degrees from 45 and finally pasted that into Photoshop.  After some more futzing we had something that looked a little like this...


With that done, we started to try and figure out what our subnavigation and navigation was going to be. Our original thought had been that we'd use the left hand column to navigate through things... i.e. click the 'maternity' link and you'd go to a page that would let you select 'tops' or 'bottoms'. That works but it's kind of clumsy. We decided that we'd much rather go with dropdown menus. Without going through the whole process, we added some dropdowns that are built into Dreamweaver (which style themselves via CSS... that's cool mostly because it let me use background images for my rollovers instead of just color. )
This is what our pulldown menus looked like after quite a bit of futzing. 


You can see that the blue from the logo has made another appearance, as has the brown (which appears as a 'hover' state when the mouse is over the button)
Anyway... with the main navigation done we had to decide what we were going to do with subnavigation. I love prototyping in Photoshop but I can't encourage sketching enough. You don't have to be the most amazing sketch artist in the world (I'm certainly not), but even just rudimentary sketches have helped me work through lots of design issues. Here's the sheet of notepaper we worked the subnav out on


I know it doesn't look like a lot, but that little piece of paper saved us a lot of time. The first thing we looked at was a straight thumbnail layout like what's on the current website. 


I thought this is a clean layout but Hartley didn't feel that it conveyed enough information. From that thought, I came up with a second 'just text' idea. 


This was also the initial thought for what eventually became the product closeup page. There are a couple of pros to this design. Going just text on the left hand navigation column allows you to convey a bunch of information about different products in a limited amount of space and it allows you to compress that information into a limited number of navigation pages (i.e. the little 1 and 2 buttons down on the bottom right hand corner of the left navigation box). Hartley didn't like that it didn't have ANY visual information though so we looked at a third option. 


Here's our third design. You can see that while we can't put quite as many lines of information (we eventually found out we could have eight items per page) doing it this way meant that we could get a little bit of a balance between the purely visual and the purely textual. The numbering on the boxes was our initial thought for how we'd name the subpages of products with HTML names. We eventually just started naming them by number so instead of there being a boys1_1.html we decided to just go boys1.html, boys2.html ad infinitum. 

After determining that that was the way to do the design we had to figure out how to implement it. My first thought was to do it in CSS. 


The 1, 2 and 3 numberings on the diagram of one of the left hand subnav buttons indicate that I was thinking of creating three CSS divs for each navigation button. Div1 would have been the button container (what the other two divs sit in for organization purposes: think of it like a box) and then there'd be a separate div for the thumbnail and text. That works and I think it would have worked, but in the interest of time, and since Hartley was going to have to implement this on her own for the most part after our design time, we decided to go a quicker and dirtier route. 
I know they're old school but I'm a big fan of imagemaps. I've been using them lately when I put together HTML e-mails, mostly because the code decays much more gracefully. I've had more luck with an e-mail program recognizing my imagemap than I have with some other rollovers and stuff. So, I thought, why not try it with these navigation buttons. It actually worked pretty well. So, the way everything is set up, instead of creating a whole series of thumbnails, we just create one graphic for each set of subnavigation. When someone navigates to page 2 of a category of products they get a completely new image but when they're looking at the first eight products the links are just from one imagemap. That sounds kind of confusing but, trust me, it works. 
Here's what our complete navigation looked like


you can see that we sampled a little bit of the header brown and herringbone for the background behind the text. Size wise, these little navigation images were coming in around 15-18k. Which, for the most part, is sipping bandwidth. 
Here's our completed product navigation page


Hartley has spent a good chunk of tonight working on all of the product imagery and navigation images. Hopefully the site will be up by the end of the week. (pending client approval of course)

Off to bed. I've got the weekly Tuesday morning class I have to tape tomorrow. 4:30 is going to come too soon. 

More tomorrow. 

and back to day 1...

It felt really good to be easing back into food today. Last night was a little rough. I had a salad to break the fast, but I'm guessing i ate too much of it. It sat in my gut and I had a hard time falling asleep because of it. 

This morning I woke up and didn't eat anything for a little while... after about an hour, I toasted one piece of toast, nuked an egg in a ramikin (a neat trick I learned here) and nuked a couple little pieces of ham. Threw it together with a THIN slice of cheddar and ate it slowly. I had some orange/banana/strawberry juice a little later in the morning with my multi-vitamin and then followed it up with a salad that had a little chicken in it for lunch. 

For dinner, Ang cooked up these petite steaks and chopped them up in a bowl of romaine with onion, cucumber and green pepper. Instead of dressing, I added salsa to my salad. 

I know I'm probably going a little faster on the food than I should, but I haven't had any soda or processed sugary things for the most part.) 

It's really odd not having sugar cravings. Maybe they'll come back (it has after all really only been a day), but I'm enjoying the respite while it's there.

Running on the treadmill and not worrying about overdoing it was nice tonight. I've been so fearful of doing some sort of damage that I couldn't repair while I was fasting that I was at least a little cautious when I jogged, tonight, while still not going all out, I threw in some extra sprints. Over 50 minutes I covered 3.77 miles and burned 622 calories. My average heart rate was 160 with a peak of 199, and I was in the zone for 25 of the 50 minutes. 

Tomorrow I'm going to start lifting. We'll see how that goes. I'm fully expecting to be sore. 


Sunday, January 20, 2008

Day 25

It's over. It ended at around 6:40 tonight. Now the next step begins. With some food in me, tomorrow the running begins. Time to dive back into the season and wrestle it back from last years mediocrity. Time to start to evaluate where I've been these past few weeks and where I'm going. 

I hope I haven't disappointed too many people. 

More later.

A tough afternoon

this has been the toughest afternoon so far. a gnawing in my gut
kicked in this afternoon. it's not that i'm ravenously hungry, but
it's made me feel pretty nasty. . . enough so that i'm wondering
whether i should continue. is it hunger? is it my body telling me that
i'm done? is it god telling me that i need to stop as some sort of
lesson in humility? i'm praying for that answer. 

i was thinking about the fast today. thinking about the fact that there's no prize at the
end of it. there's no certificate. it is, after all, a personal thing.
maybe i've learned what i needed to learn. maybe the thing i still
need to learn, humility, i can only learn by 'failing' the same way i
accused my friend of doing. anyway, i'm posting from my cell phone so
i should probably go back to focusing on what i'm doing in the
background. ( multitasking! ) more later.

Day 25 part one

The situation with my friend has been rectified. 

I've actually been putting on weight the past couple of days. I've been intentionally increasing my water intake (with a little bit of lemon juice and lime juice) because my skin was getting to be way too dry. I'm not sure how much I'll continue to go up, but being properly hydrated is really my only concern right now. 

I feel like I need to confess a sin. I've been too focused on counting down the past few days. It's not even so much that I'm hungry as it's just "ok. let's be done. ok. let's be done." It's kind of permeated all my thinking... I'm going to try and re-center myself today so that I can focus on the spiritual side. I mean, some of the books that I've read say that the time of fasting is supposed to be enjoyed as a rest. That's we're supposed to use the time of fasting as a way to revel and relax in the presence of God. I definitely haven't been doing that the past couple of days. 

Have to run out the door. I'll write more later(although also high on the priority list is a nap this afternoon. I'm so tired right now.)

Also, capsule reviews of some of the films we've seen lately. The King of Kong, The King of California, Persepolis and a japanese film called "Love on a Diet".